Realtime Django Part 7: Build a Chat application RabbitMQ and Django channels (Extras)
ASGI (The Backbone of Django channels) has gained official support in Django 3.0 and 3.1 makes it even better with full support for async views.
We’re going to change our WebSocket server from uWSGI to django channels.
Setup
This part uses Python 3.9 so we must upgrade some of the outdated dependencies
Replace the contents of requirements.txt with:
amqp==2.6.1
billiard==3.6.3.0
celery==4.4.7
Django==2.2
django-cors-headers==2.1.0
django-notifs==3.0.2
django-templated-mail==1.0.0
djangorestframework==3.7.7
djangorestframework-jwt==1.11.0
djoser==1.1.5
gevent==21.1.2
greenlet==1.0.0
kombu==4.6.11
pika==0.11.2
PyJWT==1.6.1
pytz==2017.3
simplejson==3.13.2
six==1.11.0
uWSGI==2.0.19.1
vine==1.3.0
and run
pip install -r requirements.txtdjango-notifs >= 3.0.0 comes with a lot of new changes:
- auto-retries
- support for multiple delivery backends (Not just celery)
- the notify signal has been dropped and several settings have been deprecated etc
You can read the release notes to see the full list of changes
We’ll talk about some of these changes where it’s appropriate.
The next step is to install django channels and the Postgres channel layer
pip install channels channels-postgresadd 'channels' to INSTALLED_APPS in settings.py and setup the Postgres Channel layer
INSTALLED_APPS = (
    'django.contrib.auth',
    ...,
    'rest_framework',
    'rest_framework.authtoken',
    'djoser',
    'channels',
    'channels_postgres',
    'django_jsonfield_backport',  # backport of django 3.1's JSONField

    # Our apps
    'chat',
    'notifications'
)

# django channels settings
ASGI_APPLICATION = 'chatire.asgi.application'
CHANNEL_LAYERS = {
    'default': {
        'BACKEND': 'channels_postgres.core.PostgresChannelLayer',
        'CONFIG': {
            'NAME': 'postgres',
            'USER': 'postgres',
            'PASSWORD': 'password',
            'HOST': '127.0.0.1',
            'PORT': '5432',
        }
    }
}
Channels-postgres is the link between your code and the WebSocket layer. It plays the same function as RabbitMQ in our old websocket code.
Although channels_redis is the official channel layer for django channels, there are other alternatives like channels-rabbitmq and channels-postgres
The main advantage of using channels-postgres over the alternative channel layers is that it leverages the technologies that you use/you’re already familiar with.
It allows you to introduce a “Pub/sub” server into your tech stack without increasing the overall system complexity.
Shameless plug: I’m the author of channels-postgres :-D
Before proceeding, make sure you have a postgres instance available on 127.0.0.1:5432. The easiest way to do this is with docker:
docker run --name channels-postgres -e POSTGRES_PASSWORD=password -d -p 5432:5432 postgres:alpineAfter doing this, the next step is to create a new file called asgi.py in the project root (i.e chatire/asgi.py) or update your existing asgi.py file (if you’re using Django >= 3.0) with the following content:
This example assumes that you’re running django 2.2. See the channels docs for the django >= 3.0 code
import os
import django
from channels.http import AsgiHandler
from channels.routing import ProtocolTypeRouter
os.environ.setdefault('DJANGO_SETTINGS_MODULE', 'chatire.settings')
django.setup()
application = ProtocolTypeRouter({
'http': AsgiHandler(),
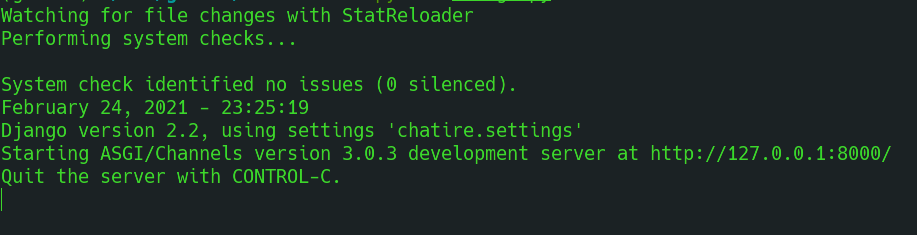
})Finally, run the database migrations and start the server
python manage.py migrate && python manage.py runserverYou should see something similar to this in your terminal
Channels consumer
Consumers are abstractions around the ASGI Spec. They are essentially like regular django views (Which are abstractions around the WSGI Spec). Hence, we have various types of Consumers e.g WebSocket consmers, HTTP and even Background Consumers! which can be used to build task queues.
In our case, we’ll need a WebSocket consumer. django-notifs comes with a WebSocket consumer which we can use instead of writing a new one from scratch.
The source code is available on Github
The connect, disconnect and receive methods are automatically called by channels in response to a “connect”, “disconnect” and message “event” respectively.
We need to update chatire/asgi.py so it’s aware of the new consumer.
import os

import django

from channels.http import AsgiHandler
from channels.routing import ProtocolTypeRouter, URLRouter

from notifications import routing as notifications_routing


os.environ.setdefault('DJANGO_SETTINGS_MODULE', 'chatire.settings')
django.setup()

application = ProtocolTypeRouter({
  'http': AsgiHandler(),
  'websocket': URLRouter(notifications_routing.websocket_urlpatterns)
})
Now you can start a new django instance on port 8081:
python manage.py runserver 8081Starting a new server instance isn’t strictly necessary. This was done for backwards compatibility with the frontend code. A single asgi webserver is capable of handling regular HTTP and WebSocket traffic But in most cases, it’s usually better to have dedicated WebSocket and HTTP server(s) for better monitoring and troubleshooting
Putting Everything together
Finally, we have to connect the dots together and send a message to the WebSocket layer when a user posts a new message. django-notifs also includes a NOTIFICATION_CHANNEL that does this for us.
To achieve this, we have to reference this channel in settings.py
NOTIFICATIONS_CHANNELS = {
    'websocket': 'notifications.channels.WebSocketChannel'
}
The last piece of the puzzle is to update the notify function in chat/views.py
from notifications.utils import notify
from notifications import default_settings as notifs_settings
...

notif_args = {
    'source': user,
    'source_display_name': user.get_full_name(),
    'category': 'chat', 'action': 'Sent',
    'obj': chat_session_message.id,
    'short_description': 'You a new message', 'silent': True,
    'extra_data': {
        notifs_settings.NOTIFICATIONS_WEBSOCKET_URL_PARAM:
        chat_session.uri,
        'message': chat_session_message.to_json()
    }
}

notify(**notif_args, channels=['websocket'])
The notify signal has been dropped in favour of a pure notify function
Restart the server
If you followed the steps properly, the Frontend should stil function and be able to receive WebSocket messages.
Further Improvements
The goal of the tutorial was to show you how to build a simple Chat application and we have achieved that. But the approach that we’ve taken so far has been more about reacting to a server side event and notifying the client.
This isn’t the best way to build a chat application because we’re not taking full advantage of the WebSocket.
recall that a WebScoekt is a bi-directional full-duplex connection so you can send and receive simultaneously but we’re essentially using it as a uni-directional connection by only receiving from it
The first Improvement we can make is to sidestep RabbitMQ and django-notifs and simply call channel_layer.group_send in chat/views.py
The RabbitMQ layer isn’t necessary if you don’t need some of it’s unique features (compared to PostgreSQL or Redis) like retries and guaranteed deliveries.
The next step you can take is to send the message directly through the WebSocket instead of the django view (via HTTP).
django channels AsyncWebSocket consumer provides a receive method that handles incoming messages. You can hook into this and use it to broadcast messages to the URI group like this:
async def receive(self, text_data):
    """
    Receive message from the WebSocket

    for bi-directional communication)
    """
    text_data_json = json.loads(text_data)
    message = text_data_json['message']

    # Send message to group
    await self.channel_layer.group_send(
        self.room_group_name,
        {
            'type': 'chat_message',
            'message': message
        }
    )
Sending the message through the WebSocket increases the overall throughput of the system and reduces the latency between sending and receiving a message.
But this introduces a problem:
Authentication?
Although a WebSocket providers lower latency and higher throughput (as it can handle more connections and data). It’s still a relatively new technology compared to HTTP.
HTTP has a lot of things going for it; authentication, proxying, caching, rate-limiting, tons of libraries and dozens of HTTP Clients, etc. Most of these are simply unsupported or in rudimentary states in the WebSocket ecosystem.
django channels tries to be of help here and provides an AuthMiddleware middleware that authenticates the current user and adds it to the Consumer’s scope. But this doesn’t really help us because the AuthMiddleware is based on the standard django authentication scheme. You’ll need to roll out your own MiddleWare to support JWT Authentication.
This is out of the Scope of this tutorial but there are tons of resources online.
PS: you should also be looking at switching to another Django JWT package because django-restframework-jwt is now unmaintained