Realtime Django Part 2: Build a Chat application with django, RabbitMQ and Vue.js (Authentication and User Management)
We’re going to kick off chatire by Implementing User Management and Authentication so users can create accounts and login.
Thanks to Django’s excellent and vibrant community, most of the work has been done for us. Hence we’re going to make use of a third-party django library called djoser
Let’s get it from pypi
pip install djangorestframework
pip install djoser
Djoser is a REST Implementation of Django’s inbuilt authentication system. So instead of forms and views that return html, it provides us with REST endpoints for user registration, token creation, user management etc.
Configuring djoser
We’re going with the simplest setup possible for djoser. Include the following in your INSTALLED_APPS
INSTALLED_APPS = (
    'django.contrib.auth',
    ...,
    'rest_framework',
    'rest_framework.authtoken',
    'djoser',
)
add djoser’s urls to urls.py:
from django.contrib import admin
from django.urls import path, include


urlpatterns = [
    ...,
    path('auth/', include('djoser.urls')),
    path('auth/', include('djoser.urls.authtoken')),
]
Include rest_framework.authentication.TokenAuthentication to django rest framework’s authentication classes:
REST_FRAMEWORK = {
    'DEFAULT_AUTHENTICATION_CLASSES': (
        'rest_framework.authentication.TokenAuthentication',
        (...)
    ),
}
Lastly, run the database migrations with python manage.py migrate this would create the tables that are required by djsoer.
That’s it! The authentication endpoints are now available for use. Let’s create a new user:
curl -X POST http://127.0.0.1:8000/auth/users/create/ --data 'username=danidee&password=mypassword'

{"email":"","username":"danidee","id":1}
Voila! we have a new user. Check out the djoser docs for the list of available endpoints and how to use them http://djoser.readthedocs.io/en/latest/base_endpoints.html
Vue.js
Vue is a JavaScript Framework for building Reactive interfaces. Even though i’m a big fan of React (Due to React-native), I still prefer Vue for developing web applications.
One of the reasons is it’s gentle learning curve, It’s very easy to get started and unlike React you don’t need a build pipeline (with Webpack and co) to build a production ready app. You can just include an external <script> tag like you would do with JQuery.
It also has a Vibrant community with lot of plugins and tutorials available on the web.
We’ll make use of vue-cli to quickly create a Vue app (instead of the <script> tag method). This method allows us to leverage the full power of ES6+ and single file Vue components.
Install vue-cli from npm:
npm install -g vue-cliLet’s scaffold a new project based on the webpack template with vue-cli
vue init webpack chatire-frontendNoTE: Make Sure you select the “install vue-router” option
This might be the right time to grab a coffee or a quick snack because this might take sometime depending on your network speed. Our ISP’s are Really terrible in Nigeria. it took over 10 minutes.
After that navigate to the new vue app and run the dev server with:
npm run dev.
You should see this when you access localhost:8080
Let’s talk about the folder structure a little:
.
├── build
│   ├── build.js
│   ├── check-versions.js
│   ├── logo.png
│   ├── utils.js
│   ├── vue-loader.conf.js
│   ├── webpack.base.conf.js
│   ├── webpack.dev.conf.js
│   └── webpack.prod.conf.js
├── config
│   ├── dev.env.js
│   ├── index.js
│   ├── prod.env.js
│   └── test.env.js
├── index.html
├── node_modules
├── package.json
├── package-lock.json
├── README.md
├── src
│   ├── App.vue
│   ├── assets
│   │   └── logo.png
│   ├── components
│   ├── main.js
│   └── router
│       └── index.js
├── static
└── test
    ├── e2e
    │   ├── custom-assertions
    │   │   └── elementCount.js
    │   ├── nightwatch.conf.js
    │   ├── runner.js
    │   └── specs
    │       └── test.js
    └── unit
        ├── jest.conf.js
        ├── setup.js
        └── specs
└── HelloWorld.spec.js-
build: This directory contains script that are used to run the webpack developement server or bundle the application when you’re ready to deploy to production. For example, The
npm run devcommand actually runs this:webpack-dev-server --inline --progress --config build/webpack.dev.conf.jsThe
--inlineoption injects the generated static files into ourindex.htmlpage. -
config: Just like the name says, this you should store configuration values for development, testing and production
-
src: This is where we’ll be writing most of our code, it contains subfolders for different aspects of our application.
Our single file components would be placed inside this folder. There’s already a default
HelloWorld.vuecomponent there.The
index.jsfile in the router folder contains the configuration for vue-router -
static: Static files (HTML, CSS and JavaScript) should be stored in this folder.
-
test: Finally, the
vue-cliwebpack template makes it easy to test our application by generating End to end tests (e2e) that are run with Nightwatch and unit tests that are run with Jest.The tests can be run with
npm run unit(For unit tests) andnpm run e2efor End to end tests.
vue-cli also sets up hotreloading for us which really improves the developer’s experience. As soon as you hit save after editing a component, the change is immediately reflected in the browser.
Configure Vue router
Create two components in the components folder. One for the main chat screen callled Chat.vue and another for User Authentication and Signup we’ll call that UserAuth.vue
Ideally what we want is to conditionally display the components based on the Login status of the user. If the User is Authenticated, we want to display the Chat component else we want them to either signup or login which means we’ll display the UserAuth Component.
We can do this by creating a implementing a global navigation. Edit the router’s index.js file to include the following
import Vue from 'vue'
import Router from 'vue-router'
import Chat from '@/components/Chat'
import UserAuth from '@/components/UserAuth'

Vue.use(Router)

const router = new Router({
  routes: [
    {
      path: '/chats',
      name: 'Chat',
      component: Chat
    },

    {
      path: '/auth',
      name: 'UserAuth',
      component: UserAuth
    }
  ]
})

router.beforeEach((to, from, next) => {
  if (sessionStorage.getItem('authToken') !== null || to.path === '/auth') {
    next()
  }
  } else {
    next('/auth')
  }
})

export default router
The beforeEach guard is called before a navigating to any route in our application.
If a token is stored in the sessionStorage we allow the navigation to proceed by calling next() else we redirect to the auth component.
No matter the route a user navigates to in our application this function will check if the user has an auth token and redirect them appropraitely.
Login/Signup page
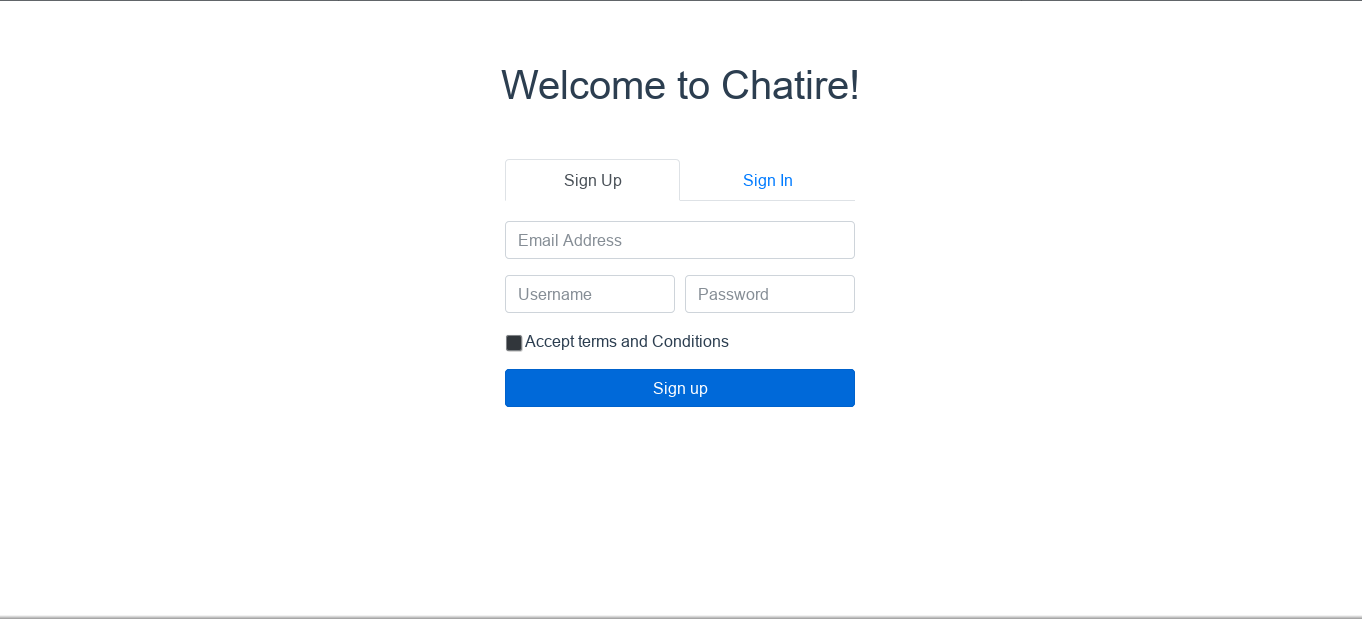
I’ve built a simple Login/Signup page with Bootstrap 4 tabs, this is the content of UserAuth.vue:
<template>
  <div class="container">
    <h1 class="text-center">Welcome to Chatire!</h1>
    <div id="auth-container" class="row">
      <div class="col-sm-4 offset-sm-4">
        <ul class="nav nav-tabs nav-justified" id="myTab" role="tablist">
          <li class="nav-item">
            <a class="nav-link active" id="signup-tab" data-toggle="tab" href="#signup" role="tab" aria-controls="signup" aria-selected="true">Sign Up</a>
          </li>
          <li class="nav-item">
            <a class="nav-link" id="signin-tab" data-toggle="tab" href="#signin" role="tab" aria-controls="signin" aria-selected="false">Sign In</a>
          </li>
        </ul>

        <div class="tab-content" id="myTabContent">

          <div class="tab-pane fade show active" id="signup" role="tabpanel" aria-labelledby="signin-tab">
            <form @submit.prevent="signUp">
              <div class="form-group">
                <input v-model="email" type="email" class="form-control" id="email" placeholder="Email Address" required>
              </div>
              <div class="form-row">
                <div class="form-group col-md-6">
                  <input v-model="username" type="text" class="form-control" id="username" placeholder="Username" required>
                </div>
                <div class="form-group col-md-6">
                  <input v-model="password" type="password" class="form-control" id="password" placeholder="Password" required>
                </div>
              </div>
              <div class="form-group">
                <div class="form-check">
                  <input class="form-check-input" type="checkbox" id="toc" required>
                  <label class="form-check-label" for="gridCheck">
                    Accept terms and Conditions
                  </label>
                </div>
              </div>
              <button type="submit" class="btn btn-block btn-primary">Sign up</button>
            </form>
          </div>

          <div class="tab-pane fade" id="signin" role="tabpanel" aria-labelledby="signin-tab">
            <form @submit.prevent="signIn">
              <div class="form-group">
                <input v-model="username" type="text" class="form-control" id="username" placeholder="Username" required>
              </div>
              <div class="form-group">
                <input v-model="password" type="password" class="form-control" id="password" placeholder="Password" required>
              </div>
              <button type="submit" class="btn btn-block btn-primary">Sign in</button>
            </form>
          </div>

        </div>
      </div>
    </div>
  </div>
</template>

<script>
  const $ = window.jQuery // JQuery

  export default {

    data () {
      return {
        email: '', username: '', password: ''
      }
    }

  }
</script>

<style scoped>
  #auth-container {
    margin-top: 50px;
  }

  .tab-content {
    padding-top: 20px;
  }
</style>
In the snippet above, v-model was used for two way data binding on all the input fields. Which means whatever is typed in those fields can be accessed on the JavaScript side with this.field_name.
We also created event listeners on both forms using @submit.prevent that’ll listen to the form submit event of each form and call the methods specified. We haven’t implemented these methods yet.
Since we’re making use of Bootstrap, instead of installing jQuery from npm we defined a variable $ that points to the globally registered window.jQuery.
We’ll use jQuery’s ajax methods to communicate with the django server. Feel free to use another ajax library like Axios if you want to decouple your application from jQuery. It’s pretty popular among Vue users.
Don’t forget to include bootstrap’s CSS and JavaScript in the main index.html page.
<!DOCTYPE html>
<html>
  <head>
    <meta charset="utf-8">
    <meta name="viewport" content="width=device-width,initial-scale=1.0">
    <link rel="stylesheet" href="https://maxcdn.bootstrapcdn.com/bootstrap/4.0.0-beta.3/css/bootstrap.min.css" integrity="sha384-Zug+QiDoJOrZ5t4lssLdxGhVrurbmBWopoEl+M6BdEfwnCJZtKxi1KgxUyJq13dy" crossorigin="anonymous">

    <style>
      .nav-tabs .nav-item.show .nav-link, .nav-tabs .nav-link.active {
        outline: none;
      }
    </style>

    <title>chatire-frontend</title>
  </head>
  <body>
    <div id="app"></div>
    <!-- built files will be auto injected -->

    <script src="https://code.jquery.com/jquery-3.2.1.min.js" integrity="sha384-KJ3o2DKtIkvYIK3UENzmM7KCkRr/rE9/Qpg6aAZGJwFDMVNA/GpGFF93hXpG5KkN" crossorigin="anonymous"></script>
    <script src="https://cdnjs.cloudflare.com/ajax/libs/popper.js/1.12.9/umd/popper.min.js" integrity="sha384-ApNbgh9B+Y1QKtv3Rn7W3mgPxhU9K/ScQsAP7hUibX39j7fakFPskvXusvfa0b4Q" crossorigin="anonymous"></script>
    <script src="https://maxcdn.bootstrapcdn.com/bootstrap/4.0.0-beta.3/js/bootstrap.min.js" integrity="sha384-a5N7Y/aK3qNeh15eJKGWxsqtnX/wWdSZSKp+81YjTmS15nvnvxKHuzaWwXHDli+4" crossorigin="anonymous"></script>
  </body>
</html>
The page should look like this:
Let’s Grab our auth token
We want to sign the user up and then redirect them to the Chat route.
To acheive that, we have to implement the signUp and signIn methods we specified earlier:
methods: {
  signUp () {
    $.post('http://localhost:8000/auth/users/create/', this.$data, (data) => {
      alert("Your account has been created. You will be signed in automatically")
      this.signIn()
    })
    .fail((response) => {
      alert(response.responseText)
    })
  },

  signIn () {
    const credentials = {username: this.username, password: this.password}

    $.post('http://localhost:8000/auth/token/create/', credentials, (data) => {
      sessionStorage.setItem('authToken', data.auth_token)
      sessionStorage.setItem('username', this.username)
      this.$router.push('/chats')
    })
    .fail((response) => {
      alert(response.responseText)
    })
  }
}
Now try and submit the form. Oops! It failed with:
Cross-Origin Request Blocked: The Same Origin Policy disallows reading the remote resource at http://localhost:8000/auth/users/create. (Reason: CORS header ‘Access-Control-Allow-Origin’ missing).
CORS
Quoting the mozilla developer’s site:
Cross-Origin Resource Sharing (CORS) is a mechanism that uses additional HTTP headers to let a user agent gain permission to access selected resources from a server on a different origin (domain) than the site currently in use. A user agent makes a cross-origin HTTP request when it requests a resource from a different domain, protocol, or port than the one from which the current document originated.
Basically It’s a mechanicsm that subverts the same origin policy. The same origin policy is what prevents a website on a different domain from making a XmlHttpRequest (Ajax) to another website/webservice. You can use CORS to weaken the security mechanicsm a little and tell the webserver that it’s safe to allow Ajax requests from a particular domain(s).
In our case, even though both webservers are running on localhost, due to the fact that they’re on different ports (8080 and 8000) they’re seen as different domains.
For the domains to match the scheme (http or https), hostname (localhost) and the port must match.
So how do we enable CORS in our django application? There is third-party app we can install to do that called django-cors-headers.
pip install django-cors-headersadd it to your INSTALLED_APPS
INSTALLED_APPS = [
    'django.contrib.admin',
    'django.contrib.auth',
    'django.contrib.contenttypes',
    'django.contrib.sessions',
    'django.contrib.messages',
    'django.contrib.staticfiles',

    # Custom Apps
    'rest_framework',
    'rest_framework.authtoken',
    'corsheaders',
    'djoser'
]
Include the middleware, (Make sure it comes before django.middleware.common.CommonMiddleware)
MIDDLEWARE = [
    'django.middleware.security.SecurityMiddleware',
    'django.contrib.sessions.middleware.SessionMiddleware',

    'corsheaders.middleware.CorsMiddleware',

    'django.middleware.common.CommonMiddleware',
    'django.middleware.csrf.CsrfViewMiddleware',
    'django.contrib.auth.middleware.AuthenticationMiddleware',
    'django.contrib.messages.middleware.MessageMiddleware',
    'django.middleware.clickjacking.XFrameOptionsMiddleware',
]
Finally set CORS_ORIGIN_ALLOW_ALL = True
Note that this enables CORS for all domains. This is fine for development but when you’re in production you only want to allow certain domain(s) this can be controlled with:
CORS_ORIGIN_WHITELIST
Read the django-cors-header documentation to find out about other options.
After doing this, you should be able to create an account and sign in immediately.
Behnind the scenes, django-cors-headers uses a Middleware to add appropriate headers to each request that tells Django that the request is safe and it should be allowed.
Logout
Because we use sessionStorage to store the auth token, we can start a new session by opening a new browser tab.
To actually persist the token between browser restarts/new tabs you can switch to localStorage.
It has the same api as the sessionStorage so you’re just changing session to local.
Then you can create a function that removes the token from the storage you decide to stick with by calling removeItem. This is how we would do it for localStorage.
localStorage.removeItem('authToken')Recap
That’s all for this part, Our goal was to built a simple User managment and auth system. We started out by installing djoser which is an excellent third party django app that provides REST endpoints for authentication.
We also saw how we could use jQuery’s ajax methods to call those endpoints from Vue.
On the road to victory, we were stopped by Same origin policy and we briefly talked about why it exists. Eventually we learnt how to allow Ajax requests from the Vue app to the django backend using CORS through django-cors-headers.
In the next part, we’ll build the django models and API for the Chat app.
Continue reading Realtime Django Part 3: Build an API with django rest framework